Fly fishing is popular here in Bozeman, MT… Children named Madison sit in most elementary classrooms. Summer sees the university students (some called Madison) from Montana State (aka Trout U) disembark for their break as anglers far-and-wide school to the trout-rich waters of the Missouri watershed. Toyota pickups haul drift-boats and dressed-down business magnates on guided pilgrimages to the Madison, Missouri, and Yellowstone…. while scruffy locals haul their Toyota pickups to favorite streams. The “intellectual capital” of a good piece of water– those glorious little capillaries where God Himself surely smiles on the solidarity and good bite that greets the invested angler– is worth as much to the visitors as the gold that brought Western man to Southwest Montana 150 years ago; and even more to the people that live here year-round.
I fish. I like it.
For years, I wet-waded from March through October. At 6’7″ and 180 lbs, manufactured fishing waders have never been an option. I have a 37″ inseam and 33″ waist, and the price to slide into a pair of those extra-special overalls seemED (emphasis on past tense) a little too “extra-“ for me.
It’s an entirely different blog post for another time, but modern garment grading (the process that creates the various sizes of a garment; usually S, M, L, XL in sportswear) fails to fit a conspicuous portion of the market: tall/slim builds; long arms; small waist/large thighs; petite women; large busts. It’s not anyone’s fault, that’s the status quo— a necessary evil to enjoy the quality and level of detail in a state-of-the-art piece of clothing—or is it?… But again, it’s a different bite of the elephant than we’ll take today.
So what to do? Like any reasonable person, I decided to make a pair.
I’ll admit, I am critical of the state of design for fishing waders. The level of detail shown – especially in construction – in some of the alpinism kits hasn’t transferred to the fishing market. The clean aesthetic that bonding technology can provide are not only hyper-modern, but more efficient for applications requiring waterproofness, avoiding material stack-up, registration, and if you pick your battles, labor. I aimed to make a rendition of wader design that centered around being “sleek”—low fuss, elegant, non-decorative. Truth be told, my everyday dress is quite “square”—I like traditional cuts and traditional aesthetics, but I wanted to make something unlike what anyone has seen…. Spoiler: it 80% worked.
Keep in mind: the full design and fabrication of these waders were on my own time after-hours over the winter season, and had only a single iteration in full-on waterproof breathable fabric, that is: the final iteration.

You can see from the process photographs that the first patterns were mocked up out of my favorite WPB substitute: painter’s plastic—wonderfully stable, with a hand similar to most 3-layer WPB, and CHEAP. It took nine iterations of pattern prototypes to block and then cut a final pattern that I was comfortable moving into the final fabric/construction with. As it came together, it fit as I expected. I chose to go stockingfoot on this pair—what I hadn’t foreseen, nor could try in the plastic prototypes, was how installing the neoprene booties would change the fit; constraining the lower leg. For all my “clever” patterning—the darts, billows, ease, and gussets—and prototyping, there were still factors I did not imagine that manifested themselves in the designed material.


Quick plug: this is where Salient design process thrives—material testing and R&D to work out process, material, and technical construction issues: chemical compatibility, patterning, material choice, cost reduction. We complete our work on-site, and in good time, getting answers from our studio/lab/shop to our clients faster and more clearly than a factory may.


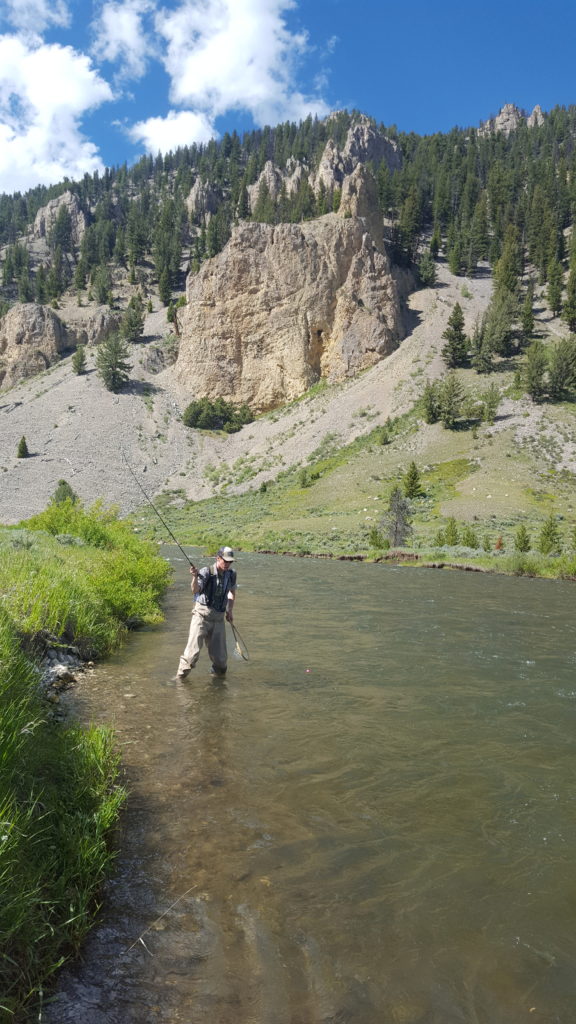
I used the waders all year long with no failures: high, cold water in the springtime Missouri, low small-stream fishing, floating on the bitterly cold Big Hole, and finger-freezing brown trout runs. I see their value, and I know the amount of work that goes into them… fishing waders are a lovely piece of kit, and I am happy to have them now.
That lower leg, though… I might have to make a revised pair….
Seth Carlstrom is the head of the Soft Goods department at Salient. He has a degree in Mechanical Engineering from “Trout U”, textile certification from NC State, and was producing performance garments and gear to fit his lanky frame long before being introduced to industry.