Welcome to our Blog

The Salient Blog

Read our Blog

Salient-Helio Collaboration: 3D Printed Titles

Earlier this spring, Zach Johaneson of Helio Collective approached Salient about creating physical movie titles for use in-camera (instead of the typical computer-generated graphics we’re all used to seeing) for the opening credits of Red Bull’s recently-released Travis Rice snowboarding film, The Fourth Phase.

From Zach:

“For intro title sequences in films, you always start by identifying how the sequence should contribute to the film at large. For The Fourth Phase, Director Jon “JK” Klaczkiewicz had a vision of starting the film off with an elemental look at the hydrocycle. Helio & Co. has been in the graphics business for about ten years now, but with this project we really wanted to push ourselves into trying something different that would also contribute to the films overarching story. This is where the idea to shoot all of the titles in camera was born, but the execution was a total mystery. After a bit of experimentation, we reached out to Salient Technologies and they helped us realize we could actually 3D print very small titles that we could then place in these different states of water. For one instance, Salient 3D printed an incredibly small and detailed title and a jig so we could freeze it into a solid block of ice and then film it. Their ability to understand our end goal and then engineer solutions to achieve those goals was absolutely critical to our success.”

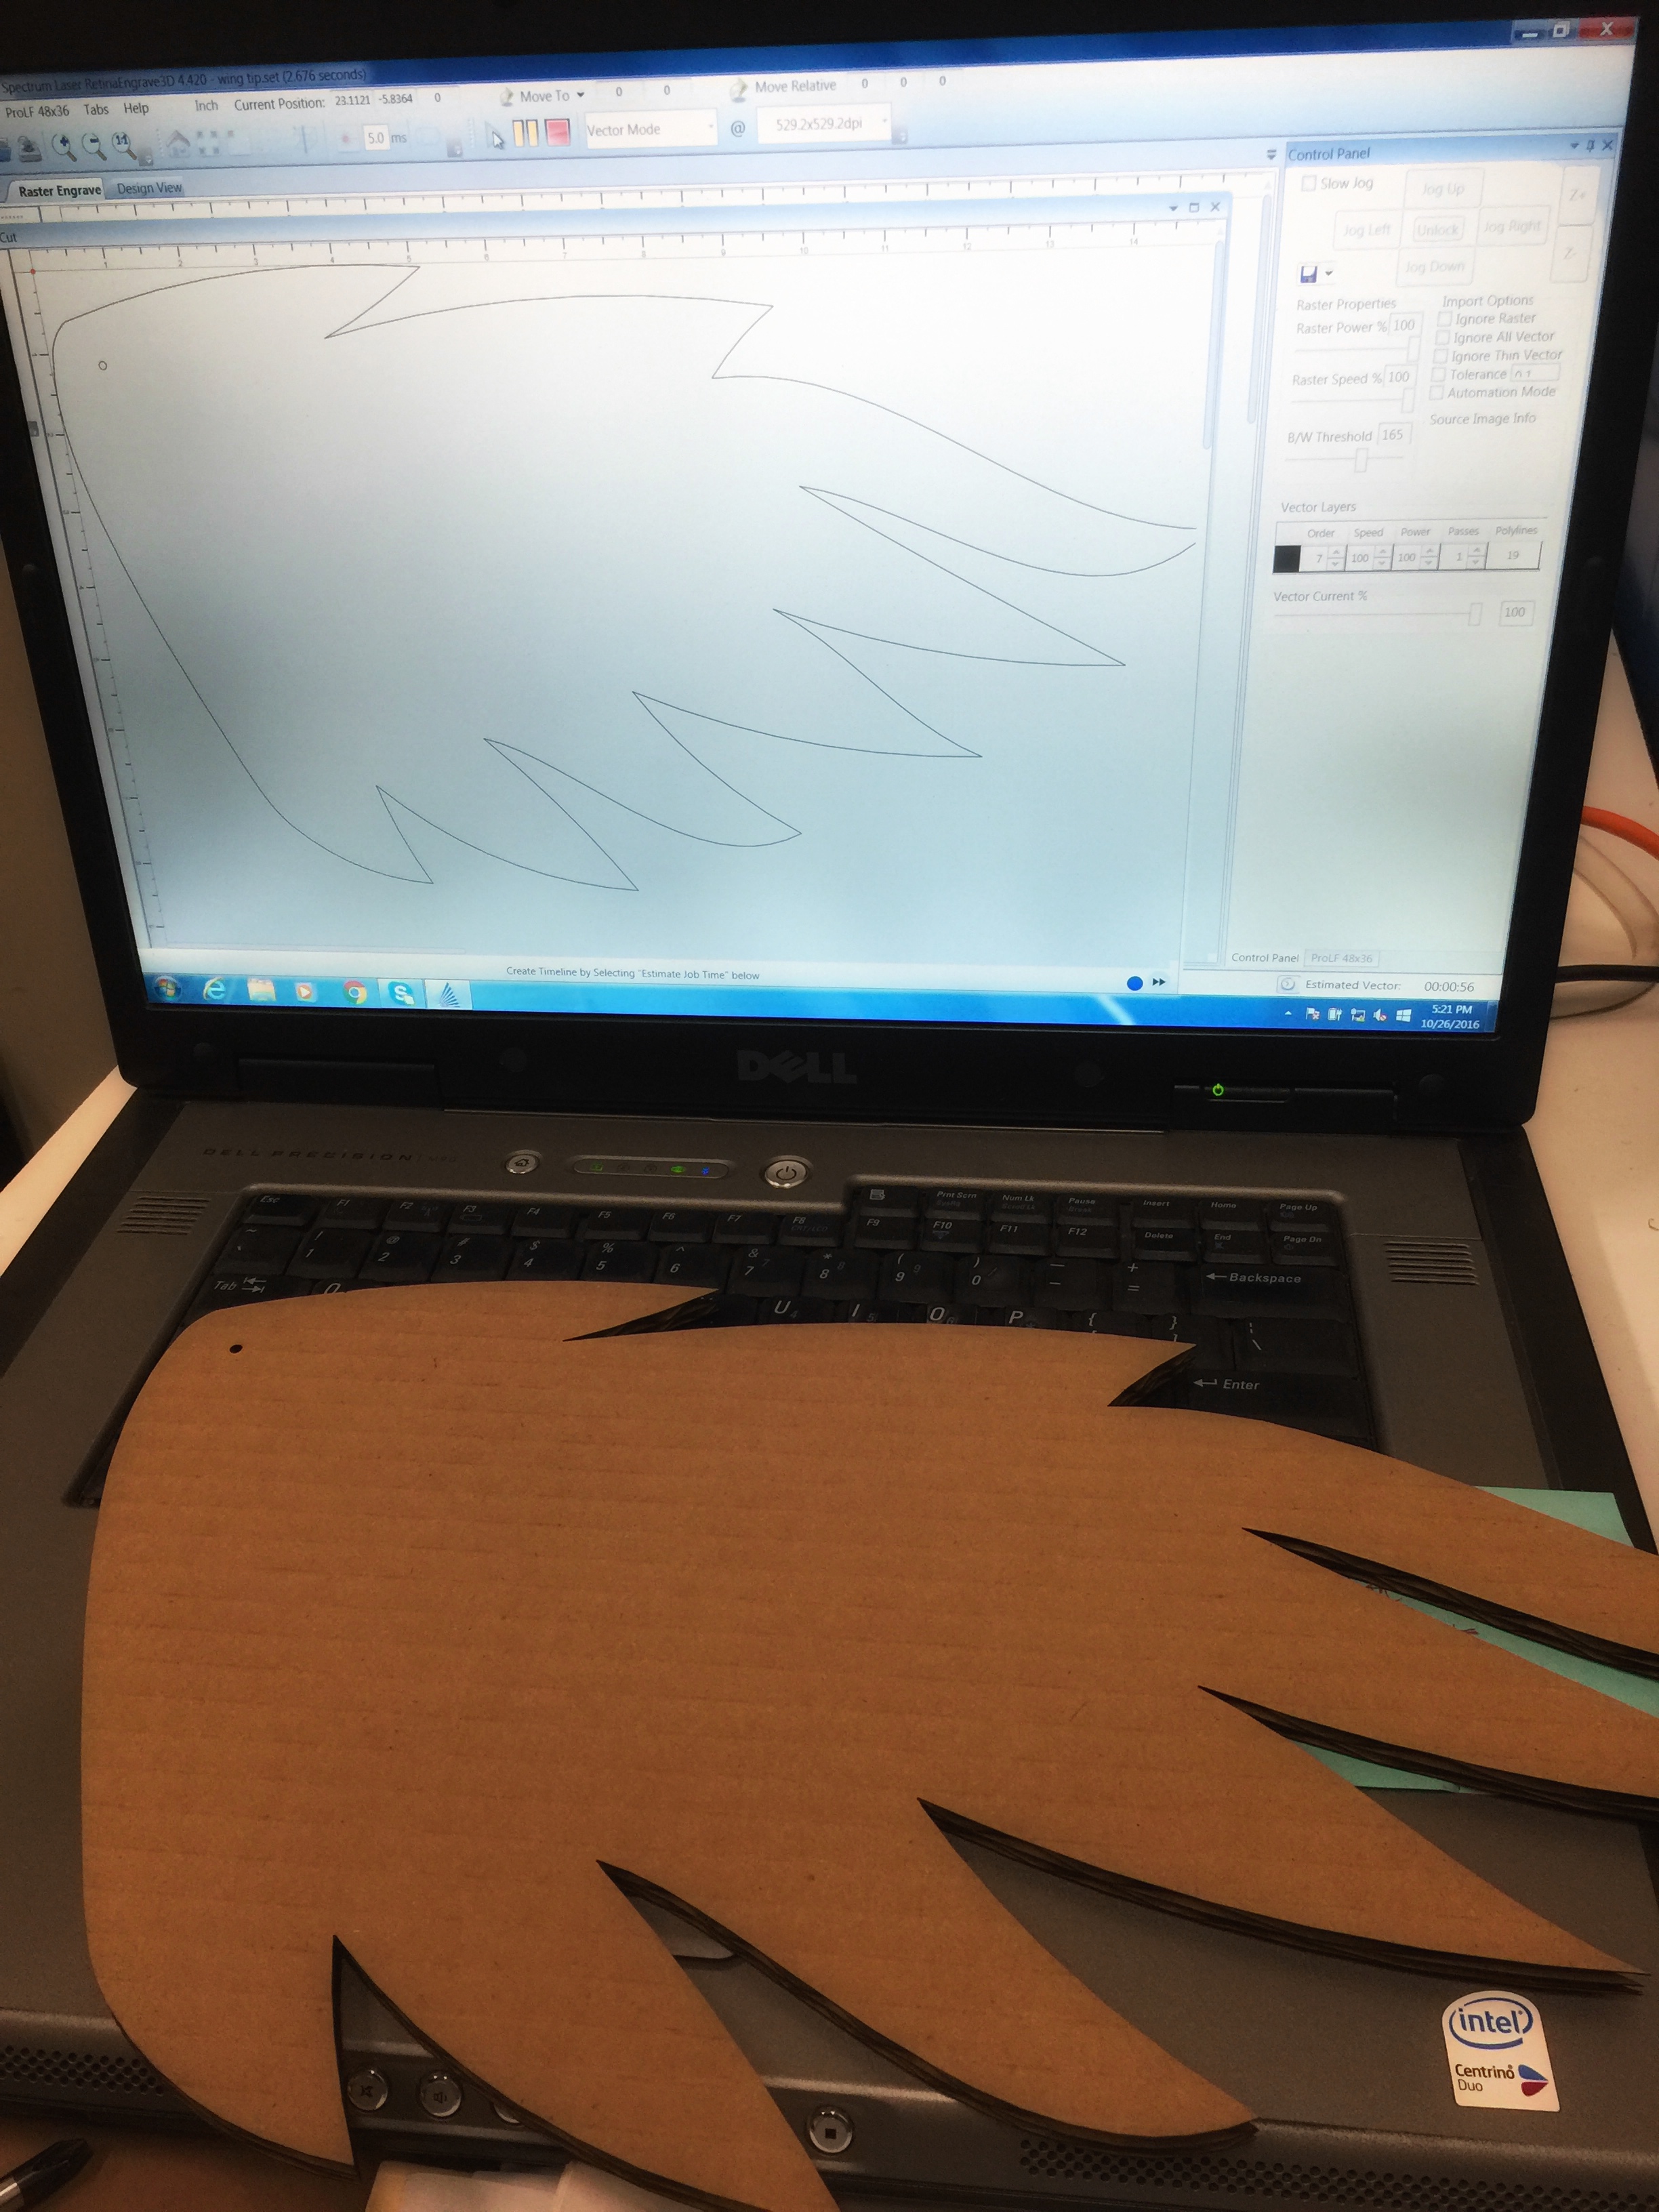
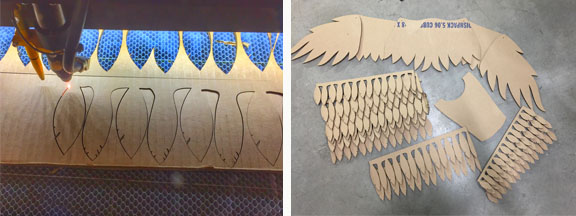
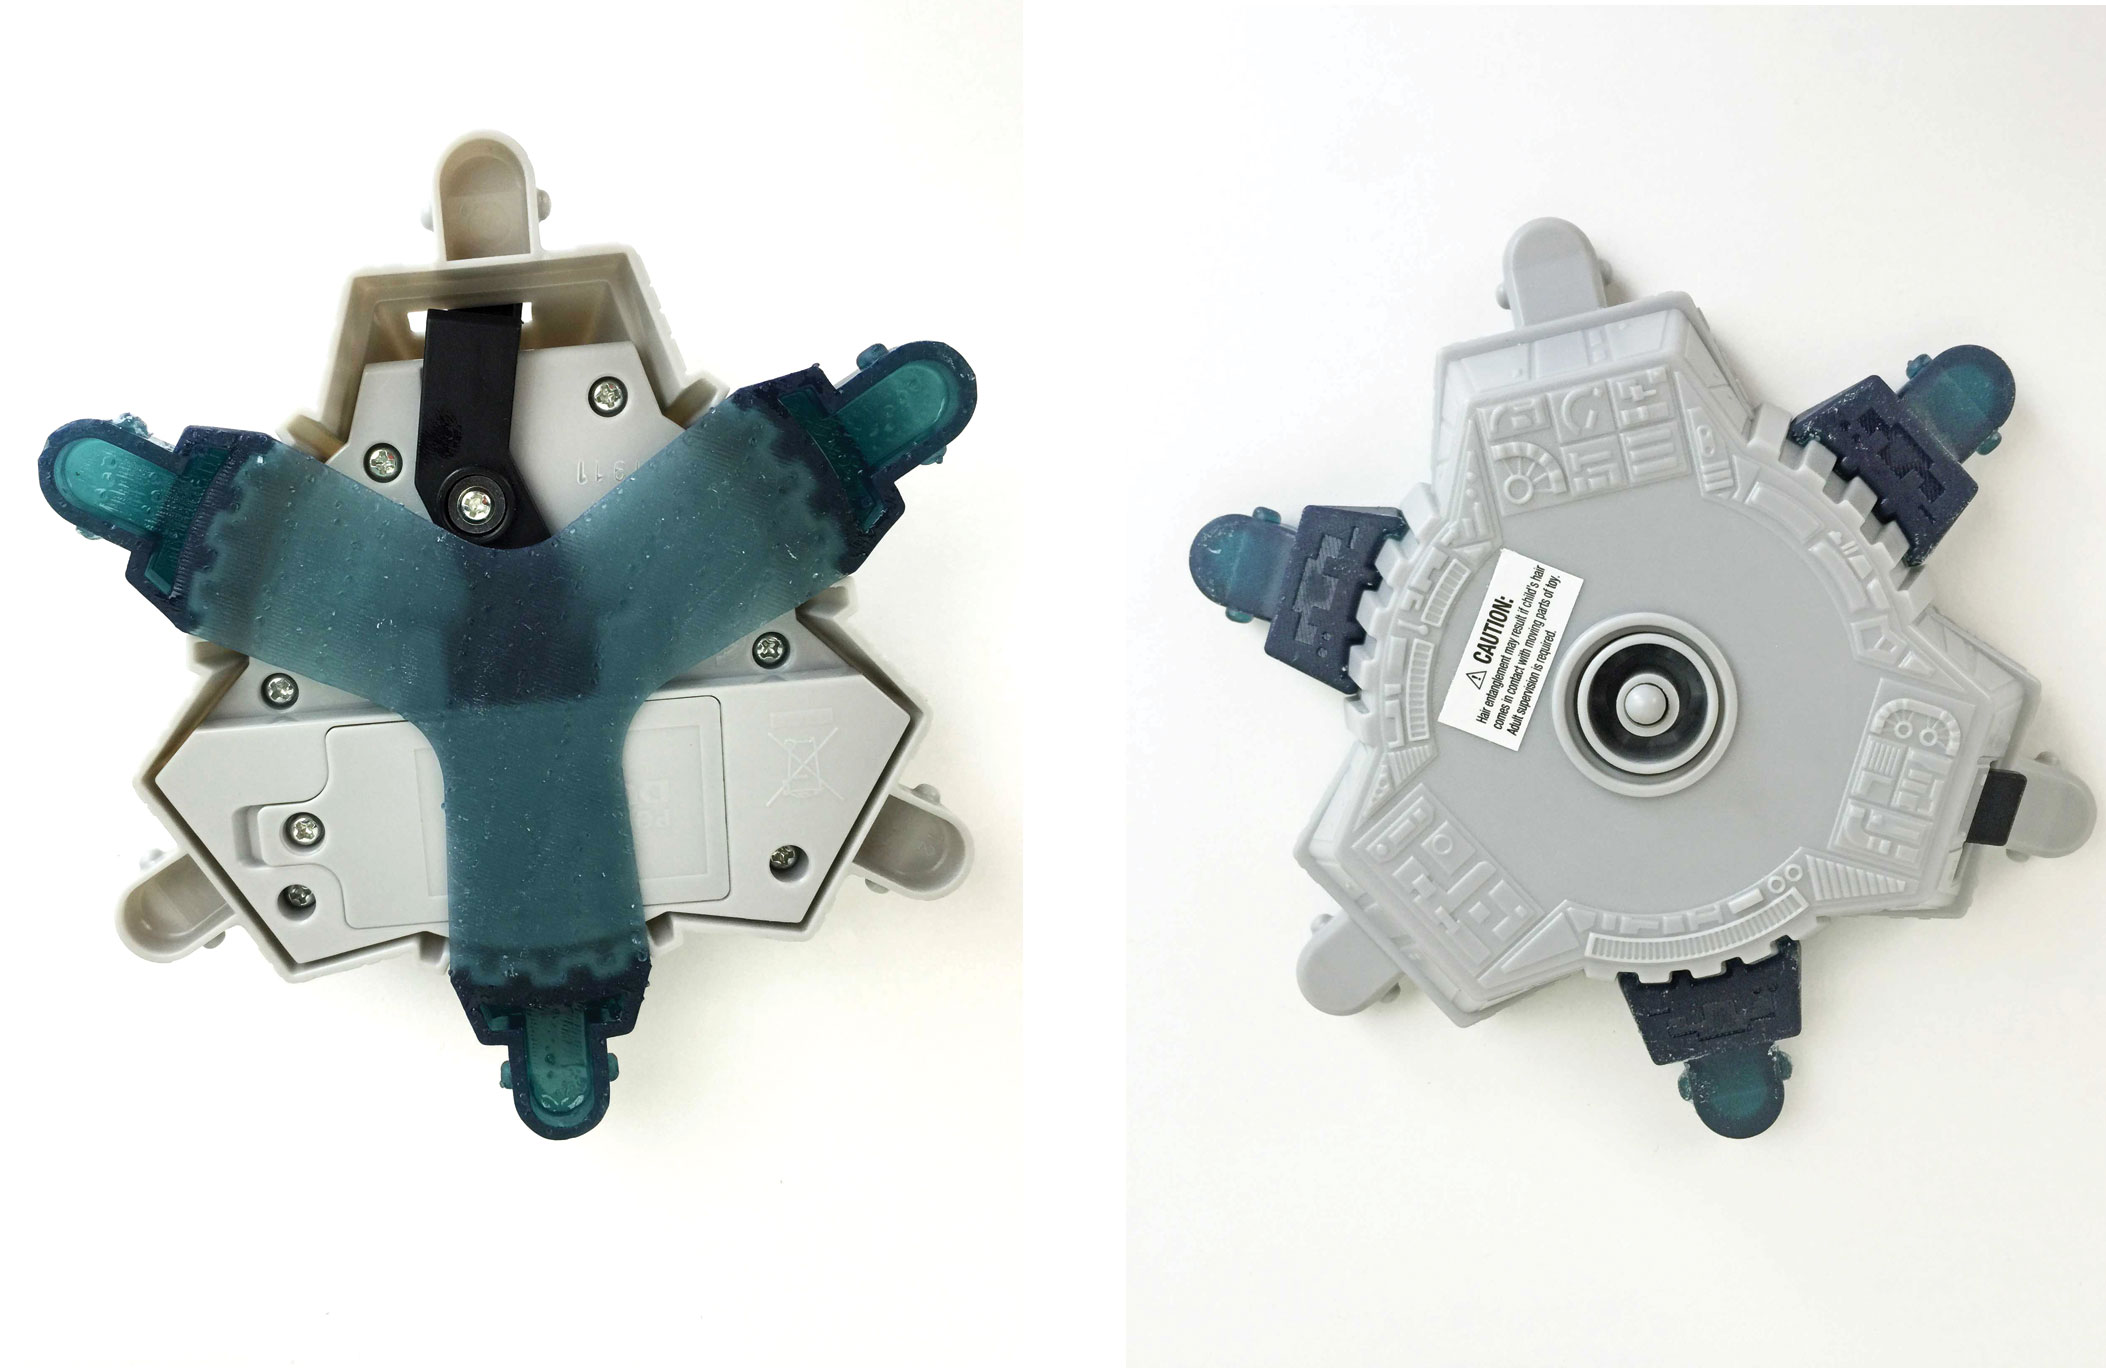
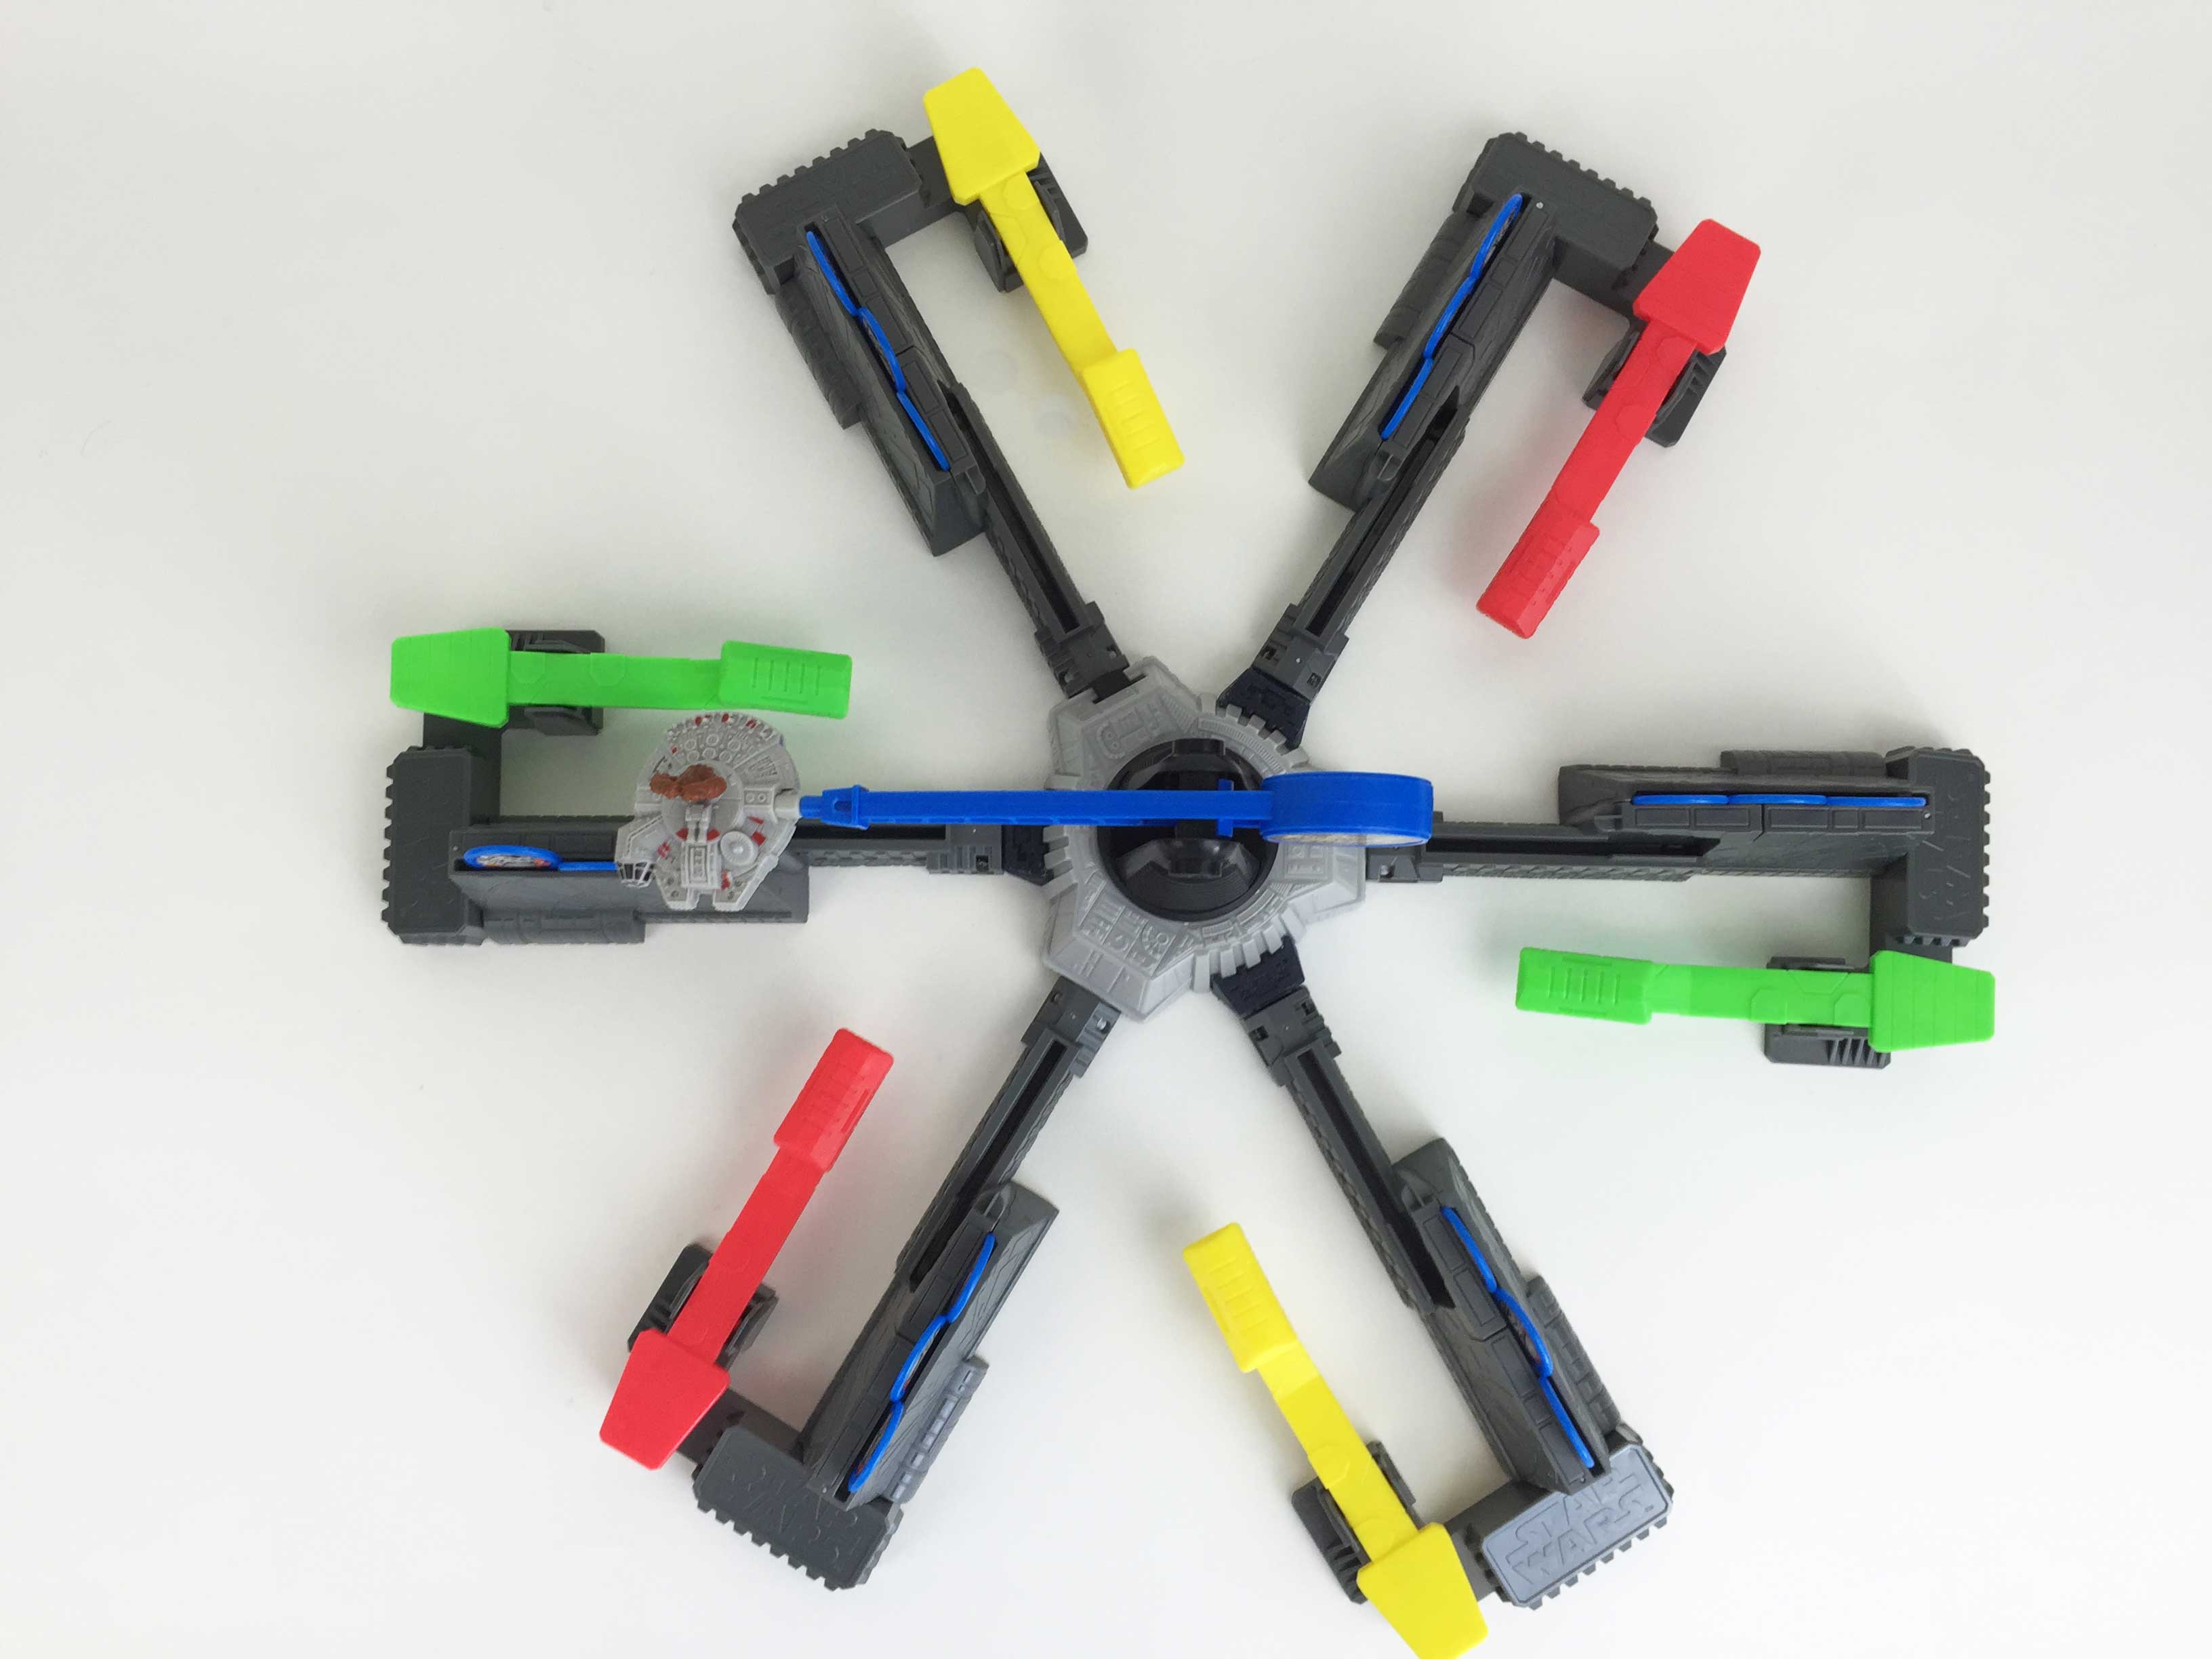
Salient and Helio explored many methods for fabricating the titles, including SLA (Stereolithography) and SLS (Selective Laser Sintering) 3D printing, laser cutting, decal cutting, and waterjet cutting.

SLS & SLA 3D printed lettering

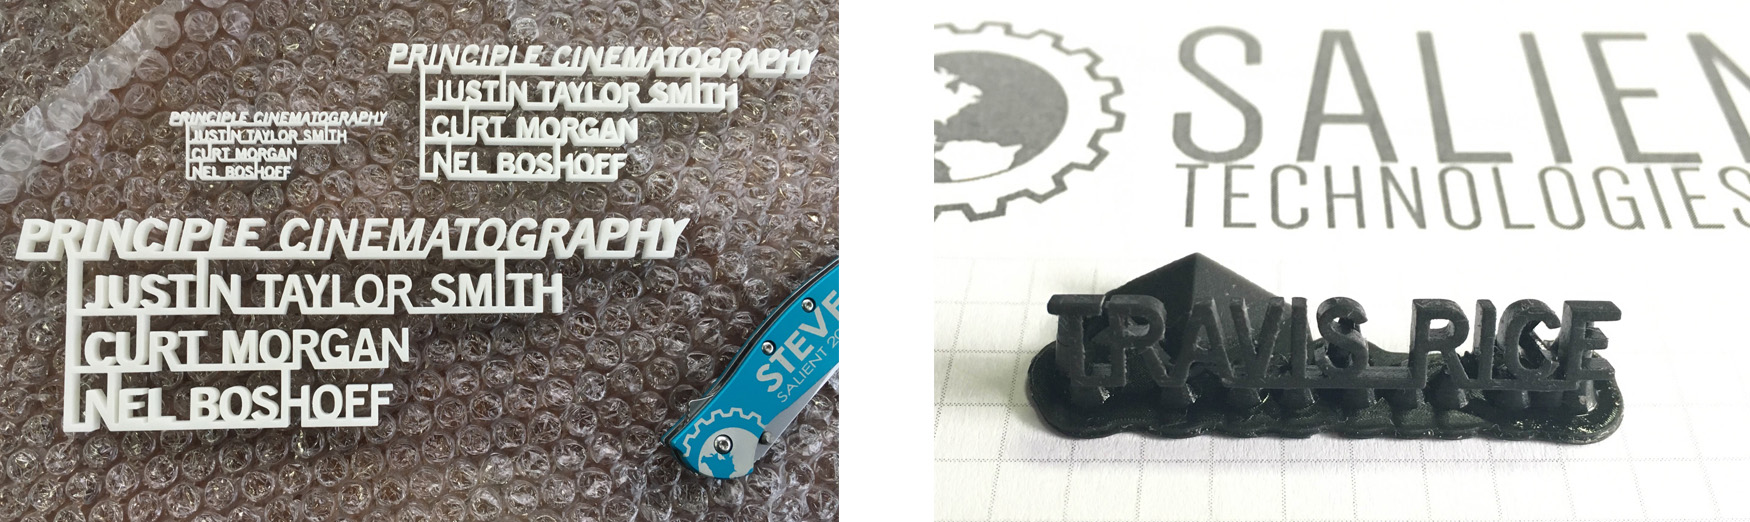
SLS 3D printed titles on Left. SLA 3D printed titles on Right.

In the end, due to size and quality constraints, we settled on SLS and SLA printing for the titles. For some of the close-up macro shots, the letters were minute – as tiny as 2mm tall. Since they were to to be shot at 6K resolution, the prints had to be very detailed and high-quality. Take a peek at the end result here:

The Fourth Phase: Opening Title Sequence from Helio + Company on Vimeo.

If you were especially perceptive, you may have noticed that “Principal” was misspelled (or misused) in a couple of the images, then corrected in the intro sequence with several more names added. A consequence of actually printing out titles and creating complex setups for filming in-camera effects (as opposed to using computer-generated graphics) is that when there are changes, they take considerably more time to fabricate. Re-printing, finish, setting up the shot, re-shooting, and re-editing is far more time-consuming than editing the spelling or content in a video program digitally, and then re-rendering. To our knowledge, this is the first use of 3D printed titles in a feature film, which is pretty exciting. Being pioneers, and making “firsts” takes sacrifice!

All images in slideshow were provided and used with the permission of Helio + Company. Helio staff featured in photos include Alex Gappa, Zach, Johaneson and Jim Menkol.

To see other work from Helio & Co, go to www.wearehelio.com

Fourth Phase 4K Trailer https://www.youtube.com/watch?v=2JHE2zkRfW4


Five Reasons Markers are Not Dead

“Rumors of my demise are greatly over exaggerated” is not only a famous quote (Mark Twain) and song lyric (Rise Against the Machine), it also accurately describes the state of markers as a tool in the product development and design industry. Long gone are the days when painstaking hours were spent on full color, hand-drawn marker renderings (thank goodness!). However, I propose marker usefulness on a daily basis has not diminished. Here are just five reasons to not write off this somewhat archaic technology:

  • Intentionally Imprecise: A chisel or widesketch exploration tipped sharpie is a great tool for quickly exploring a basic overall shape without getting caught up in details that aren’t yet pertinent. Our industry is detail oriented, and yet large markers can force you to be intentionally vague, work quickly, redirect focus to the 10,000 ft. view, cover ground and experiment with very few consequences. Fail quick, fail often and move forward more informed.
  • Line Weight: This single attribute is often sketch line weightwhat separates a great looking sketch from a less successful version. Thickness of lines is one of the quickest methods to show depth: is the line the closest one to the ground? Thick. Is the line a significant edge not attached to the bottom? Medium. Is the line an interior or contour line? Thin. Yeah, there are nuances to these rules, but if you’re not already using them, these simple guidelines will take your sketches to a whole new level. One thin pen, one medium, and one thick marker and you are in business.
  • Depth: Low fidelity sketches are generally the next step after loose thumbnails. Photoshop brushes and masking can absolutely get the job done well, but they also require scanning your linework, color balancing etc. If getting the basic surfacing ideas across quickly is the most important goal, then contour lines are useful, but can quickly become distracting. By contrast, two gray scale markers in different values (20% and 50%, or 30% and 60%) can quickly add significant depth to any linework in less time than it would take to even prepare a file for digital shading.
  • Color Exploration: There’s no need to own color exploration sketcha 72 pack with 7 shades of orange, but a basic 12 color set can be very handy to have on your desk. Say you’re are working on a water bottle and already have the general shape worked out in analog or digital formats… Scan the original sketch, duplicate, arrange in neat organized rows, and print it out. What does it look like in blue? How does a green grip affect the overall value or impact? You are only seconds away from finding out! This process is a great tool for building consensus at a design review, as everyone can quickly have a say, and there’s less “what if” conjecturing.
  • Simplicity: Have you ever tried to drag Toolsa giant drawing tablet or computer to the airport, on a bus, or even home from work in the evening? While being amazing tools, portability is a distinct drawback. Digital sketching and rendering absolutely have their advantages, but when I can grab some pens, markers and paper, sit down on a flat surface – anywhere in the world – and problem solve a design that others can visually understand in minutes, that’s a distinct advantage, and a force to be reckoned with.

Although the tools of product design continue to evolve in this increasingly digital world, don’t shelve those Prismacolor or Copic markers just yet. You may never do a 6 hour rendering by hand again in your life, but don’t dismiss an incredibly useful tool entirely just because it’s a little antiquated. If nothing else, at the end of the day, analog tools will never run out of battery power…. which is more than we can say about too many products in our daily lives.Sketches

Kirk Turner is an Industrial Designer, and has been bringing his brand of expertise to the Salient Team since 2015.


Laser Cut Birdman Costume

One handy tool for prototyping is a laser cutter.  At Salient, we use our laser to cut wood, plastic, cardboard and fabric for testing, prototypes and golden samples.  However, with Halloween upon us, why not make a cardboard Birdman costume using the laser cutter?!  Once you have a pattern, the laser cutter is more precise, repeatable and faster than cutting with a blade.

Here are some basic steps and images of the process.  For full instructions, you can visit http://www.instructables.com/id/Cardboard-Bird-Man-Costume-With-Wings/

  1. Design the flat pattern in SolidWorks keeping in mind the ideal size and articulation for the wings. (This was very fast, allowing for the quick scaling of parts and patterning of features like feathers.)Laser Cutting Birdman
  2. Cut out the pieces using the laser…. So much faster and accurate then cutting cardboard with a knife!      birdman-laser-cutting-spread
  3. Assemble the pieces using industrial strength hot glue, bolts and nuts for the wings and Gorilla Tape.      laser-cut-birdman-halloween-costume
    And, Voila!  It’s a Birdman Halloween!

Birdman Costume

6 Player Loopin’ Chewie Hack

As a gamer, maker and designer, I am a huge fan of altering toys and games for more exciting play. Sometimes you just need to make a Nerf dart fly faster or make a toy glow in the dark just for fun.  For those that love action games, Hasbro reintroduced the classic Looping Louie this last year with an epic Star Wars version called Loopin’ Chewie.  Gameplay is simple: Chewbacca flies in circles trying to knock over Stormtrooper tokens.  You defend your tokens by hitting a paddle which can launch the erratic Millennium Falcon away from your troopers and hopefully knock out your opponents.  If you are the last to have Stormtroopers, you win.

Well, the original Looping Louie was a Loopin' Chewie, Step 14 player game, and with the reintroduction, the Star Wars edition was dropped to 3 player.  While the game is super fun, I wanted to make play a little more interesting by turning it into a 6 player game.

The necessary 6 Player Loopin’ Chewie Conversion files can be downloaded for 3D print using the Thingiverse.com link below, but here is a step by step if you want to make one yourself…

1. Supplies:

  1. 2 sets of Star Wars Loopin’ Chewie Game,
  2. 3D printer,
  3. Ability to create the 3D file (or download here http://www.thingiverse.com/thing:1798407)

2. Design: Using a photograph of the motorized base as reference geometry, I drew a clip attachment in a 3D CAD software called SolidWorks that would attach to an extra paddle. The base has vertical ridges that come up at an angle, so I was able to use those to help position and hold the part.  I used calipers to measure the features on the original base to make sure my geometry was correct.  With one extra attachment complete, I simply patterned the geometry 3x around the motorized center.

Loopin' Chewie Hack, Step 2

3. 3D Printing: With the 3D file ready, I 3D printed the part on our Formlabs 2 SLA printer out of Tough Resin. This material was ideal since the part has to flex over the base to fit into place… and since it will see proper abuse when things get really competitive. The print took roughly 6 hours and can be seen finished in the machine and with the structural supports removed.

Loopin' Chewie 3D Print - Step 3

4. Assembly: Clip the 6 Player Conversion over the base from
the bottom. Since the print is semi-flexible, it can deform enough to clip over the angled base. The vertical ridges hold it perfectly in place. Attach the 6 paddles. Be careful though – it’s still a 3D print and not as strong as molded plastic. Assemble 6 competitive Star Wars fans, and prepare for battle.

Loopin' Chewie 3D hack - Step 4

5. Play: Get ready, cuz it’s about to get crazy! If you only have 3 players, you can operate a paddle with each hand…. Not easy.

Loopin' Chewie 6 Player hack

Patent Types & First to File Laws- Patent Law Q&A Ep. 5

What’s the differences between a Design Patent and a Utility Patent? Join Patent Attorney, Toni Tease and Product Designer, David Yakos as they discuss this, and also the implications of the U.S. going from a First to File to a First Inventor to File patent system.

Click the video below to listen in on their conversation, and check out other Patent Law Q&A videos on the Salient Technologies YouTube Channel

Find more info on Ms. Tease at her website teaselaw.com, and check out her blog Intellections®

David Yakos is Co-Owner and Director of Creativity at Salient Technologies, Inc.

Salient 2015 Highlights

Another year has gone by, and here at Salient, we have a lot of things to be excited about!  Here are just a few (in no particular order):side-bar

  1. The “inherently leak free” valves developed by Salient for Big Horn Valve passed
    two of the most stringent tests for oil and gas
    valves validating the technology as “emission-free” and the
    “Best Available Valve Technology to keep our environment green and clean”.
  2. Salient President and Co-owner, Steve Sanford was recognized in the Southwest Montana 20 Under 40; people, entrepreneurs and employees in southwest Montana who have achieved success and improved the quality of life for others in their communities.
  3. Salient’s David Yakos and maker, Parker Thomas, co-presented “The Mindset of a Maker” at PlayCon 2015
  4. Salient leadership team experienced  HATCH2015, a summit of 100 thought leaders from around the world to HATCH a better world.
  5. iBike Powerpod Kickstarter Success reaching 150% of their goal, and already fulfilling orders.
  6. The Salient team had 4 amazing college students shadow them on real life projects as part of Salient’s mentorship program
  7. Launch of the award-winning Maker Studio Construction Sets to inspire youth in engineering
    and creativity, co-invented by David Yakos
  8. Kickstarter success for Hydaway collapsible water bottle – backed by over 5,700 supporters, and raising over $260,000, 13x their goal!
  9. The Salient team is growing with with the addition of master Industrial Designer, Kirk Turner
  10. Team Salient helped facilitate HATCHedu to Design the School of the Future at DSEL Labs, Montana State University.
  11. Salient Co-owner, David Yakos was recognized in Origin magazine’s 45 Top Creatives
  12. In 2015, Salient provided Industrial Design, Prototype Development and Manufacturing Drawings for over 100 client products.


Kickstarter Success, New Employees & Patent Law

Client News: PowerPod Kickstarter campaign successfully funded!

iBike PowerPodSalient client, Velocomp successfully funded their Kickstarter campaign for the PowerPod cycling meter this past September, raising over $128K of their $50K goal in just 30 days!

PowerPod is a bicycle power meter that uses Velocomp’s patented power measurement technology. When c
ycling, more power means faster speeds and longer distances; better physical fitness and calorie burning.

Salient continues to support John Hamann and the Velocomp team as pre-production and tooling begin this November and production begins in the next week. If all goes according to plan, Velocomp will begin shipping fulfillment orders from their headquarters in Jupiter, FL by the end of the month. Check out the PowerPod Kickstarter campaign and post-campaign
updates here. Great work, guys!

Kirk Turner


Salient News: New Employee, Kirk Turner

The Salient team grew this June with the addition of Kirk Turner.

Originally from Maine, Kirk migrated west to the University of Utah before attending Western Washington University, where he graduated with a BS in Industrial Design and a minor in Sustainable Design in 2014. Happy to relocate to Bozeman and all the outdoor activities it has to offer, Kirk is an avid fisherman, skier, climber, cyclist and adventurer.

Kirk brings creative, precision artistry to Salient, and has expanded our in-house capabilities with his excellent Industrial Design chops.We’re excited to have Kirk on board, and all the skills he brings to the table!


Product Design Tools:  Patent Law Q&A Series with Toni Tease & David Yakos

Filing for a patent, and the entire patent process can be intimidating and confusing.  This spring, Salient’s David Yakos sat down with patent attorney Toni Tease of Intellectual Property and Technology Law to break down the patent process into bite size pieces.  You can view the Q&A series on the Salient YouTube channel. We’re still adding episodes, so check back for new videos!

The Benefits of Patent Pending – Patent Law Q&A Ep. 4

What does it mean to have a Patent Pending, and what are the benefits of being Patent Pending?

Patent Attorney, Toni Tease and Product Designer, David Yakos explore the perks of having a patent pending, and how it can impact the future of your invention.

Click the video below to listen in on their conversation, and check out other Patent Law Q&A videos on the Salient Technologies YouTube Channel

Find more info on Ms. Tease at her website teaselaw.com, and check out her blog Intellections®

David Yakos is Co-Owner and Director of Creativity at Salient Technologies, Inc.

Best Practices for Disclosing an Idea – Patent Law Q&A Ep. 3

Sharing an invention or idea you’d like to patent can be a pretty intimidating prospect.  It can be difficult to determine with whom your idea is safe, when a signed NDA (Non-Disclosure Agreement) should be in place, when you’re able to speak freely, and whether you’re becoming completely paranoid, or being appropriately careful.

In this Q&A session on patents and patent law, Toni and David discuss when and with whom it’s safe to speak about your invention or idea, when NDAs needs to be in place, when an idea becomes public, and how that impacts the timeline for filing your patent.

Find other Patent Law Q&A Session on the Salient Technologies YouTube Channel, and keep an eye out for new videos.

Toni Tease is an experienced Patent Attorney and Owner of Intellectual Property & Technology Law in Billings, MT

David Yakos is Co-Owner and Director of Creativity at Salient Technologies, Inc., a product design firm in Bozeman, MT

Provisional Patent Applications – Patent Law Q&A Ep. 2

What’s the difference between a Provision Patent Application, and a Non-Provisional Patent Application?  Are there benefits to filing for a Provisional Patent?

Find the answers in this conversation between Patent Attorney, Toni Tease, and Product Designer, David Yakos.

Click on the video below, to listen in on their conversation, and explore more Patent Law Q&A on the Salient Technologies YouTube Channel

Toni Tease is an experienced Patent Attorney and Owner of Intellectual Property & Technology Law in Billings, MT

David Yakos is Co-Owner and Director of Creativity at Salient Technologies, Inc., a prodcut design firm in Bozeman, MT

Contact Us